Showing posts with label WINDOW. Show all posts

08 August 2014

HOW TO MAKE A BOOTABLE USB FOR WINDOWS 7


Written By Admin on August 8, 2014 | Friday, August 08, 2014


Do you want to install your windows more quickly from Flash Drive (USB), so this is the right spot where you can easily make your flash drive Bootable.
Why USB is the best choice to install window instead of DVD-ROM, because some time the file may be missed while installing a windows from DVD disc, but this can be avoid by installing your operating system from USB. Follow the below steps to make your USB bootable.

To make your bootable USB for Windows 7 you must have the following things.

You need:

1. Win To Flash (Download), download Win To Flash
2. The is File of Windows 7

Download From Google Drive(Sify Network)


1. Download Win To Flash from the above Link.


2. Extract Win To Flash and install it


3. Open WinToFlash.exe, Click on Windows Setup Transfer Wizzard


A. click Next > 
B. in windows file path click select
C&D. Select your Windows 7 ISO File (or any other window) and click Next >


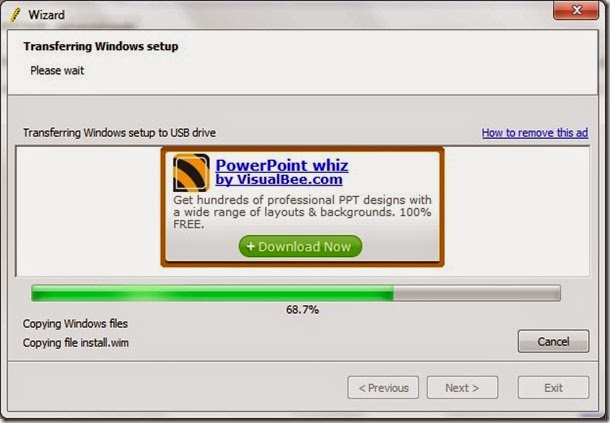
Now the process started:


Introduction To "Win To Flash":

There may come a day that optical drives are as hard to find as 5.25 floppy drives are today.
WinToFlash starts a wizard that will help pull over the contents of a windows installation CD or DVD and prep the USB drive to become a bootable replacement for the optical drive. It can also do this with your LiveCD.
You don't have to worry about scratches on the disc or misplacing your original media discs once you transfer their contents to the flash drive. The optical drive is quickly becoming a thing of the past, especially in office environments, as media is shifted to the cloud.

Note: This tutorial is not for only windows 7, if you want to make a bootable USB for Windows 8 all you have to need is Windows 8 iso file.

Courtesy : http://potools.blogspot.in/

05 February 2013

Windows 2003 Server Domain & Group Policy Configutaion Overview

Installing and setting up Windows Server 2003:


Minimum System Requirements
Processor: 400MHz
RAM: 128 MB
Hard drive: 2 GB
Resolution: 800x600 / Higher


Installation:
  • Insert windows 2003 server CD into your CD/DVD Drive.
  • Run through the installer, it's almost exactly the same as a Windows XP instal
  • On your first login you'll be prompted to update and to configure automatic updates
LAN Settings:
Before moving to active directory creation LAN IP address should be assign as static ip address. ie: 192.168.1.1 etc.,

Active Directory:
  1. To give you server roles, go to Start > Manage Your Server. 
  • You'll then be presented with the Server management page.
  • Click "Add or remove a roll". You're going to see a box come up with a list of all the roles that you can assign, there are 12 in total. 
  • Select "Domain Controller (Active Directory)" and click next.it shows "Run the Active Directory Installation Wizard to set up this server as a domain controller."
  • Next all of that until you get to "Domain Controller Type"
(or)
Goto Run > type "DCPROMO" > Press Enter.

Domain in a new forest

Select this option if this is the first domain in your organisation of if you want the new domain to be completely independent of your current forest.

Full DNS name for the new domain: dop
Domain NetBIOS name: dopserver
Database and Log Folders: Default locations
Shared System Volume: Default Location

then follow the installer configuration.

Restart Now.

When you reboot you should receive a nice message. "This Server is Now a Domain Controller"

Creating Users and Groups:
  • Start > All Programs > Administrative tools > Active Directory Users and Computers.
  • Within your domain, mine being "dop" right click and create a new "Organization Unit". This is where we're storing our groups and users.In an organisation you will have multiple departments, it is wise to create groups for each department for this example i am creating a Managers group.
  • Within your new Managers Organization Unit, create a new group. You can do this by right clicking then New or by clicking the icon on the task bar .

I named my group Managers.
Group scope: dopscope
Group type: Security

Still inside your organizational unit, create a new user.
Add the user to the group.

Right click the group, then go to Properties then the members tab.

Group Policy:

  1. Start > All Programs > Administrative tools > Active Directory Users and Computers
  2. Right click the Organizational unit that you created then click Properties.
  3. Under the Group Policy tab, click New.
  4. To edit, enabled or disabled group poilcy objects click the edit button and it'll bring up a new window.
Enable the following settings:

1) User Configuration > Administrative Templates > Windows Components > Windows Explorer

a) Remove Map Network Drive and Disconnect Network Drive
Prevents users from using Windows Explorer or My Network Places to map or disconnect network drives.

b) Hide these specified drives in My Computer (I enabled for C only)
Removes the icons representing selected hard drives from My Computer and Windows Explorer. Also, the drive letters representing the selected drives do not appear in the standard Open dialog box.


c) Prevent access to drives from My Computer
If you enable this setting, users can browse the directory structure of the selected drives in My Computer or Windows Explorer, but they cannot open folders and access the contents. Also, they cannot use the Run dialog box or the Map Network Drive dialog box to view the directories on these drives.


2) User Configuration > Administrative Templates > Windows Components > Internet Explorer

a) Disable changing home page settings
Prevents users from changing the home page of the browser. The home page is the first page that appears when users start the browser.


3) User Configuration > Administrative Templates > Start Menu and Taskbar

a) Remove Search menu from Start Menu
Removes the Search item from the Start menu, and disables some Windows Explorer search elements.

b) Remove Help menu from Start Menu
Removes the Help command from the Start menu.

c) Remove Run menu from Start Menu
Allows you to remove the Run command from the Start menu, Internet Explorer, and Task Manager.

d) Lock the Taskbar
If you enable this setting, it prevents the user from moving or resizing the taskbar.


4) User Configuration > Administrative Templates > Control Panel

a) Prohibit access to the Control Panel
This setting prevents Control.exe, the program file for Control Panel, from starting. As a result, users cannot start Control Panel or run any Control Panel items.


5) User Configuration > Administrative Templates > Control Panel > Display

a) Prevent changing wallpaper
Prevents users from adding or changing the background design of the desktop.


6) User Configuration > Administrative Templates > System > Ctrl+Alt+Del Options

a) Remove Task Manager
Prevents users from starting Task Manager (Taskmgr.exe)


7) User Configuration > Administrative Templates > Control Panel > Desktop

a) Prohibit user from changing My Documents path
Prevents users from changing the path to the My Documents folder.

09 January 2013

10 things you can do to increase performance in Vista


Windows Vista has some great new security and functionality features, as well as cool eye candy, such as Aero transparency, Flip 3D, and other graphical tricks. But all this comes with overhead that may lead to a performance hit on anything less than a top-of-the-line supercomputer.
If you find Vista’s performance lagging, the good news is that you can make it run faster. Here are some of the steps you can take.

#1: Add more RAM

There’s no denying it: Vista is a RAM-hungry operating system. Whereas XP usually runs great on 512MB, you really need a minimum of a gigabyte to run Vista acceptably. Two gigs is even better, and if you turn on all the graphical features and keep a lot of programs open, especially those that use a lot of memory, four gigs isn’t overkill.
Luckily, RAM is still relatively inexpensive — but it’s rumored to be on the rise, so get as much of it as you can, while you can. You won’t regret it.

05 November 2012

MICROSOFT OFFERS WINDOWS 8 FOR RS 1,999 TO CAJOLE USERS OF PIRATED OS


NEW DELHI: Offer a sophisticated operating system for the price of a pair of branded jeans. This seems to be Microsoft's strategy to cajole millions of users running pirated copies of its flagship Windows operating system (OS) to turn a leaf and become legitimate, paying customers.
The Redmond, Washington-based software giant is offering a deep discount on Windows 8 for a few months, selling a copy priced at Rs 11,999 for Rs 1,999. From a computer that runs Windows XP, Vista or Windows 7 - pirated or otherwise - users can download a licensed copy of Windows 8 Pro, the version with all the bells and whistles, for an 83% discount. No questions asked.

The offer is valid till January 31, 2013. An upgrade DVD costs Rs 3,499 and if you bought a Windows 7 computer after June 2012, an upgrade is yours for Rs 699.
 

Microsoft
 is silent on whether this is a security loophole or a deliberate strategy. Company officials declined comment. Raju PP, editor of tech blog Techpp.com, who installed Windows 8 on a non-activated Windows 7 installation by paying Rs 1,999, said: "I have strong reasons to believe that this was a deliberate move to push up initial sales. Microsoft is big and wise enough to do a basic check for legitimacy of Windows 7 installation. They could have done a background check of the installation or could have asked for the Windows 7 licence key. But they didn't".
For years, the hordes of users who used pirated copies of the flagship Windows OS represented a tricky knot for software giant Microsoft. They were potentially robbing the company of billions of dollars in revenue. And yet, cracking down would have made them turn to free, open-source platforms.

This would have diluted the immense network effect that benefits Microsoft and helps preserve its market dominance. So, Microsoft mostly cracked down on piracy among companies and enterprise users and left personal users alone.
 

That seems to be changing as the company unveiled Windows 8, a touchscreen-optimised OS that marks a radical departure in its user interface to usher in a tile-based system common to personal computers, tablets and mobile devices. With these upgrade offers, within four days of its launch, 4 million licences of Windows 8 have been bought and downloaded globally.
 

The deep discount is likely to find many takers among users in emerging economies who run pirated versions of the OS. "They are obviously trying to lure pirated users, which is a big market. Not many enterprises plan to move to Windows 8 as they are still in the process of moving from Windows XP to Windows 7. Microsoft is trying to tap into the big market of pirated Windows, which is much bigger than their enterprise market," said Vishal Tripathi, principal research analyst, Gartner.
 

As per Netmarkershare.com, Windows currently has over 80% market share worldwide in 
desktop OS. The main reason for piracy is the high price of a legitimate Windows copy. A genuine Windows 7 OS costs at least 5,000 (Home Basic) even today, while a pirated copy of Windows 7 Ultimate, legally priced at 11,488, can be bought for a few hundred rupees in the grey market. There has been great consumer interest in Windows 8, which clocked 16 million downloads for preview. 
Source : The Economic Times, 3 Nov, 2012

13 October 2012

XP FIX

(25 problems resolve in Windows XP - XP Quick Fix )


Enable Task Manager

Enable Registry Editor

Stop My Documents open at startup

Enable Folder Options

Restore missing Run dialog box

Enable Command Prompt

Restore My Computer (Computer) properties

Enable Recovery Console

Error when trying to access Add or Remove/ Program and Features program

Fix CD autoplay

Fix CD/DVD drive is missing or not recognized

Fix delay in opening Explorer

Fix error 1606 couldn’t access network location

Fix right-click error

Fix slow hotkeys

Fix slow network file/shared/remote

Remove OEM splash and wallpaper

Restore "Send To" context menu item

Restore Device Manager

Restore grayed Explorer and Taskbar toolbars

Restore grayed file associations

Restore My Documents properties

Restore My Network Places to Desktop

Restore Network icon to system tray

Restore the native ZIP file integration


Download XP Quick Fix

05 March 2012

"The Windows Installer Service Could Not Be Accessed" error message when you install a program in Windows XP


To resolve this issue, follow these steps:
  1. Log on to your computer as an administrator.
  2. Click Start, and then clickRun.
  3. In the Open box, type cmd, and then click OK.
  4. At the command prompt, typemsiexec.exe /unregister, and then press ENTER.
  5. Type msiexec /regserver, and then press ENTER.
  6. Verify that the SYSTEM account has full control access permissions to the
    HKEY_CLASSES_ROOT
    hive in the Windows registry. In some cases, you may also have to add Administrator accounts. To do so:Important This section, method, or task contains steps that tell you how to modify the registry. However, serious problems might occur if you modify the registry incorrectly. Therefore, make sure that you follow these steps carefully. For added protection, back up the registry before you modify it. Then, you can restore the registry if a problem occurs.

11 February 2012